We have already discussed the IR sensor you can follow that tutorial as the PIR sensor has similar Arduino programming concepts, before going into depth about PIR sensor interfacing we should have a basic idea about the PIR sensor.
The full form of PIR is Passive Infrared Sensor. It detects the heat or energy of the environment. It also acts as a motion detection sensor. The internal structure of this sensor is based on a differential amplifier which detects the change of all external changes.
This PIR interfacing gives you a basic idea about how it can be controlled remotely using the Blynk mobile app, BlueTooth module.
Components Required
Hardware Required:
01. Arduino UNO and Cell-Phone
02. OTG Cable
03. Arduino Cable
04. IR Sensor
05. Bluetooth HC-05 Module
06. Jumper Wires
Software Required:
01. Arduino-Droid App in Cell-Phone
02. Blynk App in Cell-Phone
Circuit Diagram And Connections
Arduino and bluetooth module pin configuration will be like given table.
| Arduino | Bluetooth Module |
|---|---|
| Digital Pin 10 | Tx |
| Digital Pin 11 | Rx |
| 5V/3.3V | Vcc |
| GND | GND |
Arduino and PIR Sensor module pin configuration will be like given table.
| Arduino | PIR Sensor |
|---|---|
| 5V | Vcc |
| GND | GND |
| Digital Pin 2 | Output |
Steps to Follow:
01. Make the Circuit-Connections as shown above.
02. Open Arduino Droid App.
03. Paste the Code written in the Code-Section.
04. First Compile (try to remove comments if you get error) and then Upload the code to Arduino.
05. Now open Blynk App.
06. Open Widget Box in Blynk App by touching (+) icon in the Upper-Right Corner.
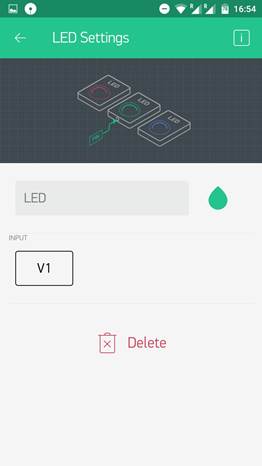
07. Now choose LED by clicking on it and set the Virtual Pin V1.
08. Now similarly choose Bluetooth Button.
09. The Blynk App Will Look like this.
10. Click Play Button and now you can read your PIR Sensor status in the Blynk App.
CODE
#define BLYNK_PRINT Serial
#include <SoftwareSerial.h>
SoftwareSerial SwSerial(10, 11); // RX, TX
#include <BlynkSimpleSerialBLE.h>
#include <SoftwareSerial.h>
int B;
// You should get Auth Token in the Blynk App.
// Go to the Project Settings (nut icon).
char auth[] = "b78eaead9f4246feb01a646e35286f40"; //(Your Auth. Code)
SoftwareSerial SerialBLE(10, 11); // RX, TX
BlynkTimer timer;
// This function sends Arduino's up time every second to Virtual Pin (5).
// In the app, Widget's reading frequency should be set to PUSH. This means
// that you define how often to send data to Blynk App.
WidgetLED led1(V1);
void myTimerEvent()
{
// You can send any value at any time.
// Please don't send more that 10 values per second.
Serial.print("Reading:");
if (B==HIGH) {
led1.on();
}
else
{
led1.off();}
}
void setup()
{
// Debug console
Serial.begin(9600);
pinMode(3,INPUT);
SerialBLE.begin(9600);
Blynk.begin(SerialBLE, auth);
Serial.println("Waiting for connections...");
// Setup a function to be called every second
timer.setInterval(100L, myTimerEvent);
}
void loop()
{
Blynk.run();
timer.run(); // Initiates BlynkTimer
Similar Challenges
- Automatic Door Opening
- Automatic Light Control
- Motion Sensor Water-Gun


